
Blog
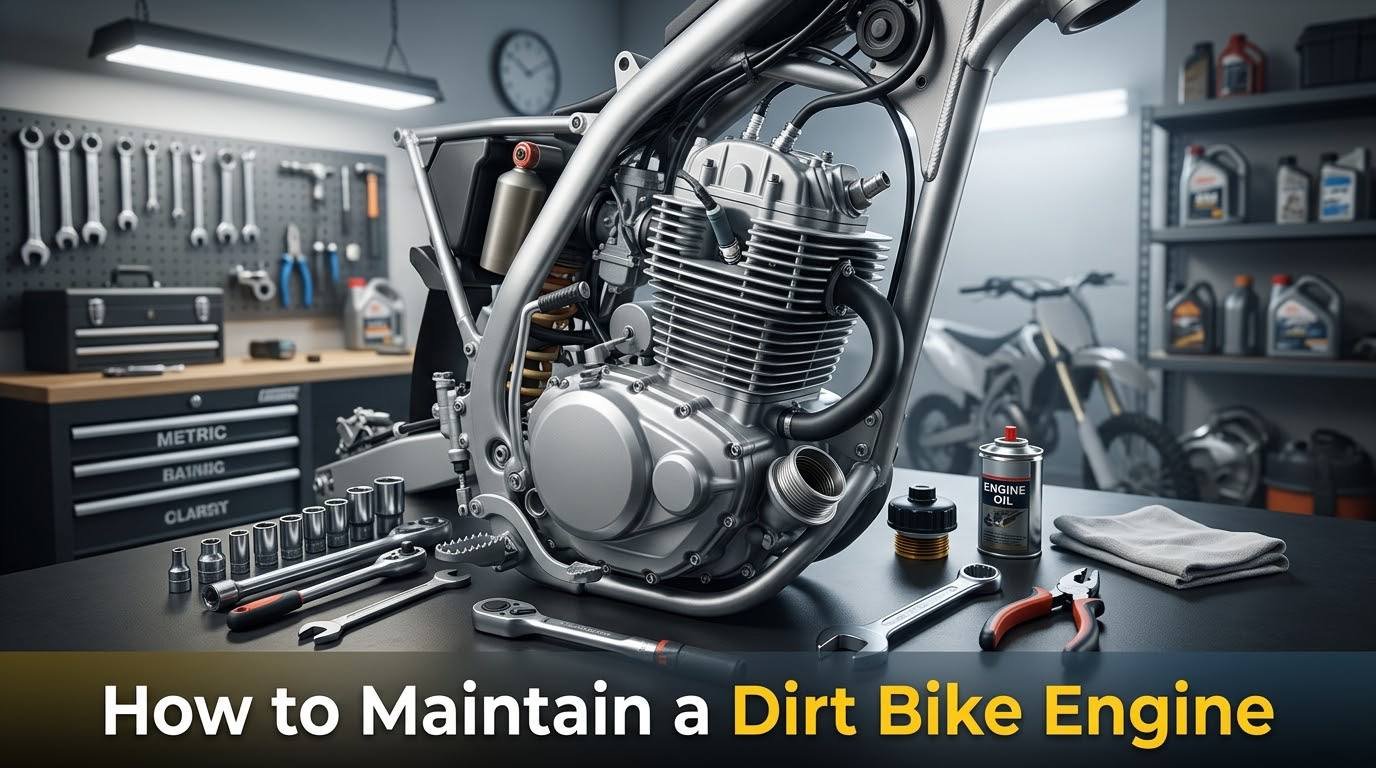
How to Maintain a Dirt Bike Engine: The Complete Guide for Every Rider

By FE-Motorsport | Powersports Maintenance | Engine Care Guides
There is something deeply satisfying about a dirt bike that starts on the first kick, pulls strong through every gear, and sounds exactly the way it should at full throttle. That feeling does not happen by accident. It is the result of consistent, intentional care given to a machine that works hard every single time you ride it.
A dirt bike engine is a precision instrument. Whether you are riding a 2-stroke screamer or a smooth-pulling 4-stroke, the engine at the heart of your machine is performing thousands of controlled explosions every minute to move you forward. That kind of intensity demands respect and respect, in this context, looks like regular maintenance done properly.
The good news is that maintaining a dirt bike engine is not complicated. You do not need a professional mechanic, an expensive workshop, or hours of free time. What you need is knowledge, a basic toolkit, and the discipline to stay consistent. This guide gives you all three.
Whether you ride a KTM, Yamaha, Honda, Kawasaki, Husqvarna, or any other brand, the principles in this guide apply to your machine. Read it once, bookmark it, and come back to it every time you need a refresher.
Why Engine Maintenance Is the Most Important Thing You Can Do as a Rider
Before we get into the specifics, it is worth taking a moment to understand what is actually at stake.
A neglected dirt bike engine does not fail dramatically or all at once. It deteriorates gradually, quietly, and expensively. What begins as a slightly dirty air filter becomes a rich running condition. A rich running condition leads to plug fouling. Plug fouling causes misfires. Misfires put stress on the piston and rings. And before long, a machine that was running perfectly six months ago is sitting on a workbench needing a full top-end rebuild that could have been prevented with a $5 air filter replacement.
This is how most dirt bike engine problems develop. Not from catastrophic events but from neglected routine. The riders who never seem to have engine trouble are not lucky. They are consistent.
Regular maintenance also protects your investment. A well-maintained dirt bike holds its value significantly better than a neglected one. When the day comes to upgrade or sell, the hours you put into care come back to you financially.
And perhaps most importantly, a properly maintained engine is a safer engine. Unexpected mechanical failures at speed are not just costly they are dangerous. Maintenance is not just about the bike. It is about the rider.
Know Your Engine: 2-Stroke vs 4-Stroke Maintenance
The maintenance routine for your dirt bike depends fundamentally on what type of engine it has. The two types have different internal architectures, different service intervals, and different failure points.
The 2-stroke engine fires once every two piston strokes and relies on oil mixed directly into the fuel to lubricate its internal components. It is lighter, simpler, and more physically intense in its power delivery. 2-stroke maintenance centers around fuel mix ratios, power valve condition, reed valves, and more frequent top-end service.
The 4-stroke engine fires once every four piston strokes and has a dedicated oil system separate from the fuel. It is heavier, more complex internally, and delivers smoother, more torque-based power. 4-stroke maintenance centers around oil and filter changes, valve clearance inspections, and periodic cam chain service.
Where the two converge is on the fundamentals: air filtration, spark plugs, cooling systems (for liquid-cooled engines), and the fuel system. These apply regardless of engine type and will form the backbone of this guide.
1. The Air Filter: The First Line of Defense
If there is one maintenance task that matters more than any other for a dirt bike engine, it is keeping the air filter clean. Full stop.
Every second your engine is running, it is drawing air through that filter. That air is mixed with fuel and combusted inside the cylinder. Anything that gets through the filter alongside that air, whether it is dust, sand, or fine grit, acts as an abrasive inside the engine. Over time, contaminated air accelerates wear on the piston, rings, and cylinder bore in ways that cannot be undone.
A clean air filter costs a few dollars. A new piston and cylinder can cost several hundred. The math is simple.
How to clean your air filter:
Begin by removing the seat and the airbox cover to access the filter. Before pulling the filter out, stuff a clean rag into the airbox opening this prevents any debris from falling into the intake while you work. Remove the filter carefully and take it outside or to a well-ventilated area.
Wash the filter in warm, soapy water, working the foam gently between your fingers to release trapped dirt. Rinse thoroughly until the water runs completely clear. Allow the filter to air dry fully never use compressed air or heat, as both can damage the foam. Once dry, apply a dedicated air filter oil evenly across the entire surface of the foam. The oil is not optional it is what captures the fine particles that would otherwise pass straight through.
Reinstall the filter, ensuring it seats properly and creates a complete seal in the airbox. A filter that is not fully seated is worse than a dirty one it creates a bypass point for unfiltered air to enter the engine.
How often: After every ride in dusty or sandy conditions. Every 3 to 5 rides in normal conditions. Never assume always check visually before every session.
2. Engine Oil and Oil Changes (4-Stroke Engines)
For 4-stroke dirt bike owners, engine oil is the lifeblood of the machine. It lubricates every moving internal component, carries heat away from critical surfaces, suspends contaminants in suspension until they can be captured by the filter, and forms a protective film on metal surfaces that prevents wear.
The problem is that oil degrades. Heat, combustion byproducts, and mechanical shear break down the oil’s molecular structure over time, reducing its ability to protect the engine. Old oil that looks dark or smells burnt has already lost significant protective capability. Continuing to run it puts your engine at risk.
Choosing the right oil: Always use the oil type and viscosity specified in your owner’s manual. For most 4-stroke dirt bikes, this means a dedicated motorcycle engine oil rather than automotive oil. The reason is important: motorcycle oils are formulated to work with wet clutch systems that share the oil supply with the engine. Automotive oils often contain friction modifiers that cause wet clutch slip and erratic engagement. Use a quality brand, and match the viscosity to your climate and riding conditions.
How to change the oil:
Warm the engine up for a few minutes before draining warm oil flows more completely and carries more suspended contaminants out with it. Place a drain pan beneath the engine, remove the drain bolt, and allow the oil to drain fully. Replace the drain bolt with a new crush washer (reusing the old one risks a slow leak). Remove and replace the oil filter a new filter with every oil change is the correct approach, not every other change. Refill with the specified quantity of fresh oil, start the engine, and let it idle for a minute while checking for leaks. Recheck the level with the dipstick or sight glass and top up if needed.
How often: Most 4-stroke dirt bikes require an oil change every 5 to 10 hours of riding time. Hard, competitive riding at the shorter end of that range. Trail riding at the longer end. When in doubt, change it sooner. Fresh oil is cheap. Engine damage is not.
3. Fuel Mix Maintenance (2-Stroke Engines)
For 2-stroke riders, the equivalent of an oil change is getting your fuel mix right every single time. There is no oil reservoir to change on a 2-stroke the lubrication happens inside the combustion chamber via oil pre-mixed with the gasoline. This means the quality and accuracy of your mix directly determines how well your engine is lubricated on every single ride.
The standard ratio for most 2-stroke dirt bikes is 50:1, though some engines specify 40:1 or 32:1 for break-in or specific operating conditions. Always verify the ratio in your owner’s manual and follow it precisely using a measuring syringe rather than guessing.
Use fresh pump gas and a quality 2-stroke oil rated JASO FD or FC. Never use automotive motor oil. Never use gasoline older than 30 days stale fuel loses volatility, encourages phase separation in ethanol blends, and leaves varnish deposits in the carburetor that cause hard starting and poor performance.
Mix in a separate, dedicated fuel container. Shake gently before filling the tank. And if the bike will sit for more than two weeks without being ridden, drain the tank and run the carburetor dry rather than leaving stale premix to gum up the fuel system.
4. Spark Plug Inspection and Replacement
The spark plug is a small component that carries enormous diagnostic importance. Beyond its job of igniting the fuel-air mixture in the cylinder, the condition of the electrode tells you a great deal about how your engine is running.
Reading your spark plug:
A healthy, correctly running engine produces a plug with a light tan or grayish-brown electrode. This tells you the fuel mix and combustion temperature are in the right range.
A black, sooty, or oily electrode indicates a rich running condition too much fuel relative to air. On a 4-stroke, this often points to a clogged air filter or a carburetor needle set too rich. On a 2-stroke, it frequently indicates too much oil in the premix or a fouled power valve.
A white or very light gray electrode indicates a lean condition too little fuel relative to air. A lean engine runs hot and is at risk of serious internal damage if the condition is not addressed. This is the more serious of the two.
A worn, eroded electrode with significant gap widening tells you the plug has simply done its time and needs replacing. Plug gaps widen with use, reducing the energy of the spark and causing harder starting and misfires.
Replacing the plug: Use the exact plug specification listed in your owner’s manual. Do not substitute. Install finger-tight, then snug to the specified torque with a plug socket overtightening can damage the cylinder head threads, which is a far more serious problem than a loose plug.
How often: Inspect every month during regular riding. Replace at the beginning of each season, or immediately when the electrode shows signs of wear or incorrect combustion conditions.
5. Cooling System Maintenance (Liquid-Cooled Engines)
Many modern dirt bikes use liquid cooling to manage engine temperatures more precisely than air cooling alone. The cooling system uses a water and coolant mixture circulated through passages in the engine by a water pump, dissipating heat through a radiator.
A cooling system that is not maintained fails quietly and expensively. Coolant degrades over time, losing its corrosion inhibitor properties and becoming acidic. Acidic coolant attacks the aluminum alloy components of your engine from the inside water passages, the water pump housing, and the cylinder head. The damage is invisible until it causes a serious failure.
What to do:
Check the coolant level in the overflow reservoir before every ride. The level should be between the minimum and maximum marks. A consistently dropping level indicates a leak that needs immediate investigation coolant does not evaporate normally.
Flush and replace the coolant annually or every two seasons at most, even if the level looks fine. Use a coolant specifically formulated for aluminum engines not automotive green antifreeze, which can cause corrosion in motorcycle cooling systems. Most manufacturers recommend a 50/50 premix of distilled water and coolant.
Inspect the radiator fins periodically for damage or blockage from mud and debris. Bent fins reduce airflow and cooling efficiency. Carefully straighten bent fins with a flat tool. Clear packed mud from between the fins with a gentle water rinse never high-pressure washing directly at the radiator, which bends fins and forces water past seals.
6. Valve Clearance (4-Stroke Engines)
This is the maintenance task that most casual riders skip and most experienced riders consider non-negotiable. On a 4-stroke engine, the intake and exhaust valves open and close thousands of times per minute to let the fuel-air charge in and exhaust gases out. The small gap between the valve stem and the rocker arm or cam follower the valve clearance must be within a precise specification for the engine to run correctly and the valves to seat properly.
Valves that are too tight do not seat fully, leading to compression loss and eventual valve burning. Valves that are too loose create excessive mechanical noise and erratic timing. Neither situation is good for the engine.
Checking and adjusting valve clearance requires removing the valve cover, finding top dead center on the compression stroke, and measuring the clearance with feeler gauges. It is more involved than most other maintenance tasks but is entirely achievable for a mechanically minded owner with the right tools and a workshop manual.
How often: Every 20 to 40 hours of riding time, depending on the engine. More frequently on performance engines that run higher temperatures. Check your owner’s manual for the specific interval and clearance specifications.
7. The Power Valve (2-Stroke Engines)
Many 2-stroke dirt bike engines use a power valve system a variable exhaust port that changes its opening size based on engine RPM to broaden the powerband. It is one of the features that makes modern 2-strokes so rideable compared to the narrow-banded machines of earlier decades.
Over time, carbon deposits build up on the power valve and its housing, eventually causing the valve to stick or move sluggishly. A stuck power valve completely changes the power delivery character of the engine you will notice a flat spot or an abrupt, unpredictable power hit where the powerband should feel smooth.
Cleaning the power valve requires removing it from the exhaust port and carefully removing carbon deposits with a dedicated carbon cleaner and a soft brush or wooden tool. Never use metal tools on the valve itself, as scratches create points for carbon to adhere to more aggressively. Inspect the valve, its housing, and the O-rings for wear or damage before reinstalling.
How often: Every 20 to 30 hours of riding, or whenever you notice a change in the powerband character.
8. Chain and Sprocket Care (Engine Output System)
The drive chain is the mechanical link between your engine’s output and the rear wheel. Neglecting it does not just wear the chain and sprockets it increases the load on the engine’s output shaft and gearbox, accelerating wear on components that are far more expensive to replace.
Check chain tension before every ride. Most dirt bikes specify between 1.2 and 2 inches of slack measured at the midpoint of the lower chain run, with the bike on a stand and the suspension unloaded. Adjust using the rear axle tensioners, keeping both sides equal to maintain wheel alignment.
Lubricate the chain after every ride while it is still warm the heat helps the lubricant penetrate the chain’s side plates and rollers more effectively. Use a dedicated chain lubricant rather than WD-40 or generic oil, which wash off too quickly to provide meaningful protection.
Inspect the sprocket teeth regularly. Hook-shaped or unevenly worn teeth mean the sprocket and chain should be replaced together. Fitting a new chain to worn sprockets, or vice versa, accelerates wear on the new component and is a false economy.
9. Pre-Ride and Post-Ride Routines: The Habits That Protect Everything
Beyond the scheduled maintenance tasks above, two habits matter as much as anything you do in the workshop: what you do before you ride and what you do after.
Before every ride:
Walk around the bike and look at it. Check the tire pressure correct pressure affects handling, traction, and tire wear. Look at the chain tension and condition. Check the brake levers and pedal for proper feel and free play. Confirm the fuel level. Squeeze the front brake while pushing the bike forward to verify the brake engages firmly. Start the engine and listen to it at idle for 30 seconds if something sounds wrong before you ride, it will only get worse once you do.
After every ride:
Clean the bike. Not for appearances but for maintenance. Mud and dirt on an engine retain moisture and accelerate corrosion. A post-ride clean also exposes any new leaks, cracks, or damage that are much easier to see on a clean bike than a dirty one. Check the coolant level (liquid-cooled engines). Re-lubricate the chain. Note anything that felt or sounded different during the ride while it is fresh in your memory.
These routines take 10 to 20 minutes combined. Over a season of regular riding, they will save you hours of troubleshooting and hundreds of dollars in preventable repairs.
10. Break-In Procedure for a New or Rebuilt Engine
If you have just purchased a new dirt bike or completed an engine rebuild, the break-in period is one of the most critical phases of your engine’s life. The first few hours of operation establish the wear patterns between piston rings and cylinder bore, between cam lobes and followers, and between every other precision-fitted surface inside the engine.
Rush the break-in and those surfaces never fully seat, leaving microscopic high spots that continue to wear abnormally for the engine’s entire life. Do it properly and you add years of reliable service.
For most 4-stroke engines, the break-in process involves varying the throttle frequently, avoiding sustained high RPM operation, and completing the first oil change after just 1 to 2 hours of running time while the metal particles from the initial seating process are still suspended in the oil.
For 2-stroke engines, run a slightly richer fuel mix during break-in (40:1 instead of 50:1 is commonly recommended), avoid sustained full-throttle operation, and vary RPM frequently throughout the first tank of fuel.
Always consult your owner’s manual for the specific break-in procedure recommended by your engine’s manufacturer. Different engines have different requirements, and the manual is the authoritative source.
Maintenance Schedule Quick Reference
| Task | 2-Stroke | 4-Stroke |
|---|---|---|
| Air filter check | Every ride | Every ride |
| Air filter clean or replace | Every 3 to 5 rides | Every 3 to 5 rides |
| Fuel mix (fresh batch) | Every 2 to 4 weeks | N/A |
| Engine oil change | N/A | Every 5 to 10 hours |
| Oil filter replacement | N/A | Every oil change |
| Spark plug inspection | Monthly | Monthly |
| Spark plug replacement | Every season | Every season |
| Coolant check | Before every ride | Before every ride |
| Coolant flush | Annually | Annually |
| Valve clearance check | N/A | Every 20 to 40 hours |
| Power valve cleaning | Every 20 to 30 hours | N/A |
| Chain tension check | Before every ride | Before every ride |
| Chain lubrication | After every ride | After every ride |
| Sprocket inspection | Monthly | Monthly |
The Right Parts Make All the Difference
Every maintenance task in this guide is only as good as the parts and products you use to perform it. Cheap oil, off-brand air filters, and incorrect spark plugs undermine the work you put in. Quality consumables are not a luxury they are a fundamental part of doing maintenance correctly.
At FE-Motorsport, we stock a full range of parts and accessories for dirt bikes, ATVs, and powersports machines across all brands. Whether you need a replacement air filter, a new spark plug, chain lubricant, or anything else to keep your engine in peak condition, we have you covered.
We carry leading brands across the full range of dirt bikes and powersports machines from youth mini bikes and the iconic Yamaha Banshee 350 to full-size KTM, Husqvarna, Kawasaki, and more. If you are shopping for your first dirt bike or your next one, our inventory has something for every rider at every level.
👉 Browse Dirt Bikes at FE-Motorsport 👉 Shop Parts and Accessories 👉 View the Full FE-Motorsport Inventory
📞 (909) 342 5340 | 📧 support@femotorsport.com
Our team is available to help you find the right parts for your specific machine. Call or email us and we will point you in the right direction.
Frequently Asked Questions
Q: How often should I service my dirt bike engine? The honest answer is more often than most riders think. Air filters need checking before or after every ride in dusty conditions. Oil changes on a 4-stroke should happen every 5 to 10 hours of actual riding time, not calendar time. Spark plugs deserve a look every month during riding season. The exact schedule depends on your engine type and how hard you ride, but the guiding principle is always the same: when in doubt, do it sooner rather than later.
Q: What is the most common cause of dirt bike engine failure? The vast majority of preventable dirt bike engine failures come down to one of three things: a dirty air filter that allowed abrasive particles into the engine, incorrect or insufficient lubrication, or overheating caused by low coolant or a blocked radiator. All three are entirely preventable with consistent routine maintenance. The engine failures that seem sudden rarely are they are the result of gradual neglect that reaches a breaking point.
Q: Can I use car engine oil in my dirt bike? No, and this is a mistake that causes real damage. Automotive engine oils are formulated for 4-stroke car engines with dry clutch systems. They contain friction modifiers that reduce wear in a car engine but cause slipping and erratic engagement in a motorcycle’s wet clutch, which shares its oil supply with the engine. Always use an oil specifically labeled for motorcycles or powersports applications, and match the viscosity specification in your owner’s manual.
Q: How do I know if my dirt bike engine needs a top-end rebuild? The clearest sign is a noticeable loss of compression, which you will feel as reduced kick-back resistance on the kickstarter and a general lack of power that was not there before. A compression gauge gives you a definitive measurement compare the reading to the specification in your owner’s manual. Excessive smoke, oil consumption, metallic engine noise, and difficulty maintaining idle are additional indicators. On a 2-stroke, a piston and ring replacement is a routine maintenance item rather than a repair many riders do it proactively every season regardless of symptoms.
Q: What type of air filter oil should I use? Use a dedicated air filter oil from a reputable brand such as Maxima, Bel-Ray, or Uni Filter. These are formulated specifically for foam air filters and are designed to capture fine particles while maintaining airflow. Do not substitute with WD-40, general-purpose sprays, or motor oil these either do not capture fine particles effectively or they damage the foam over time.
Q: My dirt bike is hard to start after sitting for a few months. What should I check first? Start with the fuel system. Gasoline left in the carburettor float bowl over an extended period leaves a varnish-like residue that blocks the tiny fuel jets. Remove the float bowl and spray carburettor cleaner through all passages. Follow that with a fresh spark plug and fresh fuel mix (on a 2-stroke) or fresh oil and fuel (on a 4-stroke). In most cases, a bike that sat unprepped will come back to life after these three steps.
Q: How important is it to warm up a dirt bike engine before riding hard? Extremely important. Cold engine oil is thicker and circulates more slowly, meaning critical components receive less lubrication in the first minute or two of operation. Cold metal also has tighter clearances that expand to their designed tolerances as temperature rises. Starting a cold engine and immediately riding at full throttle is one of the fastest ways to accelerate internal wear. Allow the engine to idle for one to two minutes, then ride gently for the first few minutes until the engine reaches operating temperature.
Q: What happens if I run a 2-stroke with the wrong fuel mix ratio? Both directions carry consequences. Too much oil (richer than the specified ratio) causes plug fouling, excessive smoke, reduced power, and carburettor clogging from oil deposits. Not enough oil (leaner than specified) is far more serious insufficient lubrication causes overheating of the piston and cylinder, which can progress to piston seizure in a very short time. Always use the ratio specified in your owner’s manual and measure your oil with a syringe rather than estimating.
Q: How do I check if my dirt bike’s valve clearances need adjustment? You will need a set of feeler gauges and access to the valve cover. With the engine cold and the piston at top dead center on the compression stroke, you slide the specified feeler gauge blade between the valve stem and the rocker arm or cam follower. If the gauge slides through with no resistance or binds and cannot pass, the clearance is outside specification and needs adjustment. The exact clearance values are in your owner’s manual and vary between intake and exhaust valves. If you are not comfortable performing this yourself, it is worth having a qualified technician do it incorrect valve clearance is a significant engine health issue.
Q: Can I perform all this maintenance myself or do I need a mechanic? The vast majority of the maintenance in this guide is well within reach for any motivated owner. Air filter cleaning, oil changes, spark plug replacement, chain maintenance, coolant checks, and visual inspections require only basic tools and the ability to follow instructions. Valve clearance adjustment and power valve service require slightly more skill and specific tools but are still achievable for a mechanically confident owner with a workshop manual. The tasks that genuinely benefit from professional attention are deep engine rebuilds, cylinder replating, and electrical diagnostics. For everything else, the best mechanic for your dirt bike is one who knows it intimately and that is you.
Q: Where can I buy quality parts for my dirt bike in the USA? FE-Motorsport is a 100% American-owned and operated powersports dealer stocking parts and accessories for a wide range of dirt bikes and powersports machines. We carry everything from air filters and spark plugs to full machines, and our team is available to help you identify the right part for your specific bike. Shop online at femotorsport.com or reach us directly at (909) 342 5340 or support@femotorsport.com.
Final Word: Consistency Is Everything
The riders who get the most out of their machines are not always the most talented. They are the most disciplined. The ones who clean the air filter before it gets critical, change the oil before it gets dirty, and check the chain before it gets loose. The ones who treat maintenance not as a chore but as part of the riding experience itself.
A well-maintained dirt bike does not just run better. It inspires more confidence, performs more predictably, and lasts longer than any machine that is ridden hard and maintained poorly. The hours you invest in your engine come back to you every time you pull back on the throttle and feel it respond exactly the way it should.
Take care of your machine. It will take care of you.
Ready to shop quality dirt bikes, parts, and accessories from a dealer you can trust?
👉 Shop FE-Motorsport American-Owned Powersports Since 2016
📞 (909) 342 5340 | 📧 support@femotorsport.com
Free shipping promotions available on qualifying orders. Contact us for current offers.